
How to Rekey Your Locks: A Step-by-Step Guide 🔑🛠️
Homeownership comes with countless responsibilities—one of the most important being home security. Rather than replace every lock (which can be costly), many Orlando homeowners opt to rekey their locks for a fraction of the price. In this guide, you’ll learn how to rekey your locks, why it’s often smarter than buying new hardware, and how to complete the process safely at home. Let’s dive in! 😃
What Is Rekeying? (How to Rekey Your Locks) 🔄
Rekeying is the process of changing the internal pins and springs of a lock so that old keys no longer operate it. Instead of buying a brand-new lock, you simply adjust the lock cylinder to match a new key. Here’s why rekeying makes sense:
-
Cost Savings: A new lock can run $50–$200 per unit. Rekeying usually costs $15–$25 per lock (or less if you DIY).
-
Enhanced Security: Lost a key? Moved into a new home? Rekeying ensures previous keyholders are locked out.
-
Convenience: Want all your locks on one key? Rekeying lets you create a “keyed-alike” set so you carry fewer keys.
For Orlando homeowners, rekeying locks is a quick and budget-friendly way to upgrade security. If you prefer a professional touch, check out our Residential Lock Services to see how Good Deal Locksmith can handle the job efficiently. 🏠🔒
Tool Checklist for Rekeying at Home 📋🧰
Before attempting to rekey your locks, gather these tools and supplies. Having everything on hand ensures a smoother process:
-
Rekeying Kit: Usually includes a key gauge, plug follower, pinning tray, and assorted pin sizes.
-
New Key Blanks: Choose a blank that matches your lock brand (Schlage, Kwikset, etc.).
-
Screwdrivers: Flathead and Phillips to remove lock hardware.
-
Tweezers or Pinning Pliers: For handling tiny pins and springs.
-
Pinning Chart or Code Card: Shows which pin sizes correspond to your new key’s cut depths.
-
Key Decoder (Optional): If you lack the original key, a decoder reveals existing pin sizes.
-
Lubricant (Graphite or Lock Lube): Keeps reassembled locks turning smoothly.
-
Safety Glasses: Protect your eyes from small, spring-loaded parts that may fly out.
Having these items ready is crucial—nobody wants to stop halfway through and run to the hardware store! If you need professional-grade tools or guidance, Good Deal Locksmith can supply everything and walk you through best practices via our Lock Maintenance page. 🧰💪
Step-by-Step Rekeying Process 🔍🔧
Below is a detailed walkthrough on how to rekey your locks at home. Follow each H3 major step to ensure success.
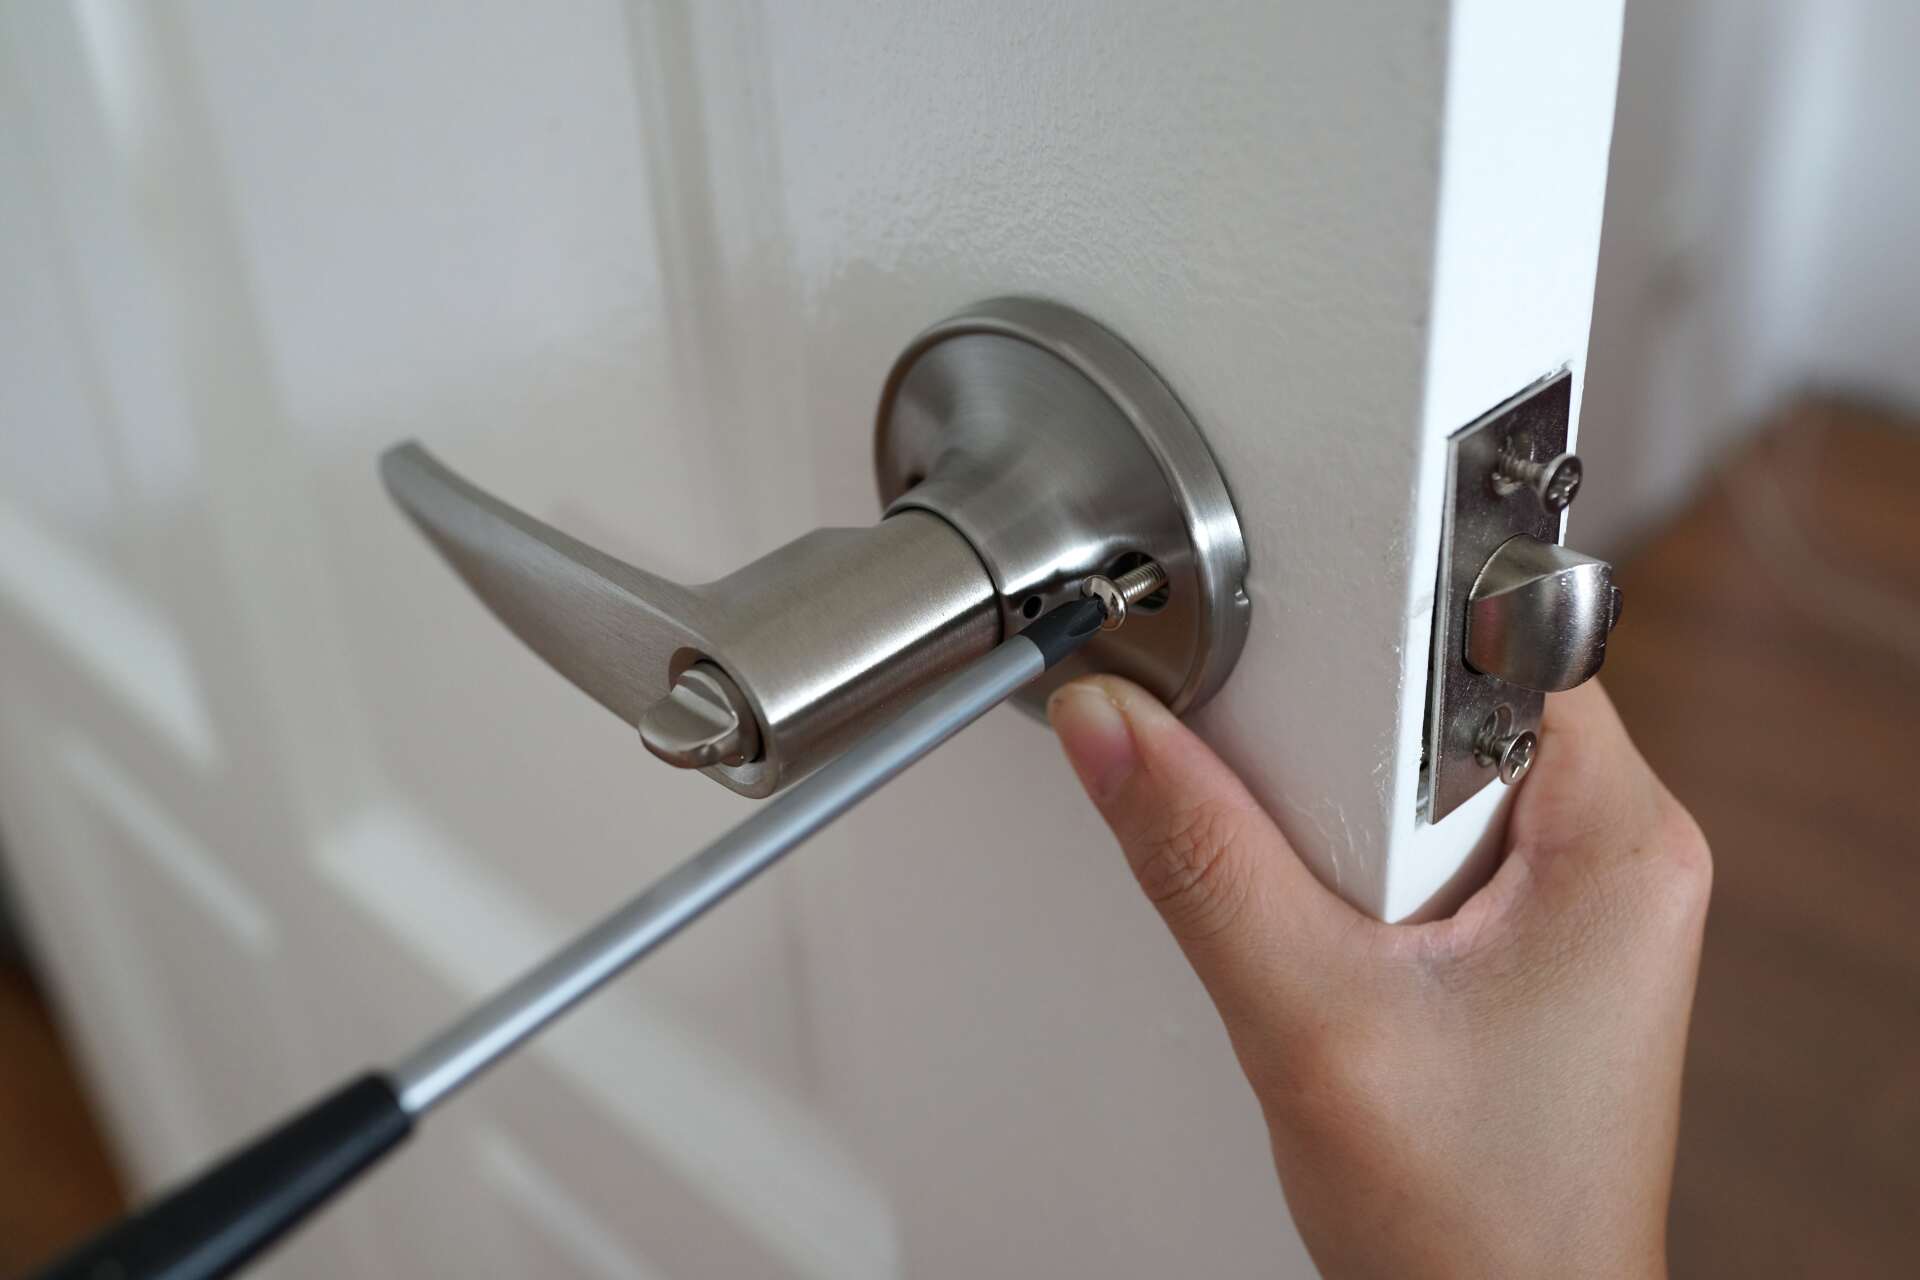
Step 1: Remove the Cylinder 🚪🔑
-
Unscrew the Mounting Screws: Using your screwdriver, remove the screws on the interior side of the door lock.
-
Extract the Lock from the Door: For a doorknob/lever, pull the handle or knob to disengage and slide the lock set out. For deadbolts, retract the bolt and gently pull the cylinder out of the door.
-
Remove the Cylinder Plug: Insert your existing key and turn it 90° (or as your lock manufacturer specifies). While holding the key in this turned position, insert a plug follower (or an appropriately sized screwdriver) behind the plug to press it out of the housing—take care to keep the driver pins and springs contained in the housing.
💡 Tip: Work over a white cloth or pinning tray so you can see and organize every tiny piece.
Step 2: Disassemble the Cylinder 🧩🗃️
-
Count and Sort Existing Pins: Once the plug is out, you’ll see driver pins stacked on top of key pins inside the lock housing. Use tweezers to remove each stack, noting which chamber it came from.
-
Consult Your Pinning Chart: If you have the old key, you know each cut depth—match these to the correct pin sizes. If not, use a key decoder to measure existing pin sizes.
-
Clear All Old Pins and Springs: Place the old pins in a separate pile. Springs should go back into the housing for safe-keeping—remember, they’re under tension and may jump if mishandled!
🔒 Pro Tip: Keep a detailed note or photo of your pin arrangement. This makes it easier if you ever need to revert or troubleshoot.
Step 3: Replace the Pins 🔩🔑
-
Insert New Key into the Plug: Slide your new key blank into the plug just enough to hold new pins in place.
-
Select Correct Pin Sizes: Following the pinning chart, identify the correct pin for the deepest cut on your new key, then proceed in ascending order.
-
Place Pins into Plug Chambers: With tweezers, carefully place each new pin so it sits flush when the new key is inserted.
-
Test Pin Alignment: Gently pull the key back a fraction to ensure the shear line (where plug meets housing) is clear. If any pin protrudes above or below, swap for the correct size.
👍 Fact: Proper pin alignment is key—if pins aren’t cut precisely, the lock will jam or refuse to turn.
Step 4: Reassemble and Test 🏗️✔️
-
Reinstall Springs and Driver Pins: Place each driver pin over its corresponding new key pin in the housing, then position the springs on top.
-
Push Plug Back into Housing: Using the plug follower, slide the plug back in slowly while keeping downward pressure on the driver pins to prevent misalignment.
-
Reinstall Cylinder into Door: Place the rekeyed cylinder back into its housing, secure any retaining clips or screws, and reattach the lock hardware to the door.
-
Test with the New Key: Insert the new key and turn it several times—ensure it moves smoothly. If it sticks, remove the cylinder and re-check pin heights. Once smooth, apply a light graphite or lock lube for optimal performance.
🚀 Quick Check: If the key turns effortlessly and locks/unlocks without wobble, you nailed the rekey!
Common Mistakes to Avoid ❌🔍
When learning how to rekey your locks, watch out for these common missteps. Avoiding them will save you headaches:
-
Mixing Up Pins: Keep track of each pin’s original chamber. Mixing sizes leads to jamming.
-
Forgetting Springs: Missing even one tiny spring means the corresponding driver pin won’t seat properly.
-
Using Incorrect Pin Sizes: Double-check the pinning chart. A pin too long or too short prevents a clean shear line.
-
Failing to Test Before Reassembly: Always rotate the plug slightly with the new key installed before fully reassembling—adjust here rather than disassembling later.
-
Over-Tightening Screws: Screws that are too tight can warp the lock housing, making the newly rekeyed lock stiff or immovable.
🔑 Reminder: A little patience and careful attention to detail can make you a rekeying pro!
Conclusion & Next Steps 🎉📞
Rekeying your locks is a cost-effective, DIY-friendly way for Orlando homeowners to regain control of their home’s security without replacing every piece of hardware. By following this guide on how to rekey your locks, you’ll:
-
Save hundreds of dollars compared to full lock replacements.
-
Improve security by disabling old keys.
-
Streamline your keyring by creating a “keyed-alike” system.
If at any point this process feels daunting—or if you’d rather leave it to certified pros—contact Good Deal Locksmith. Our expert technicians will handle all your rekeying needs promptly. Plus, explore our Residential Lock Services for full lock installation or upgrade packages, and don’t forget routine Lock Maintenance to keep your home’s security in top shape.
🔐 Secure your peace of mind today—call Good Deal Locksmith in Orlando for a free estimate or professional rekey service! ✨